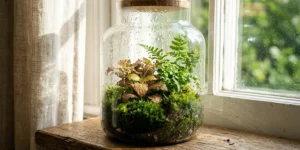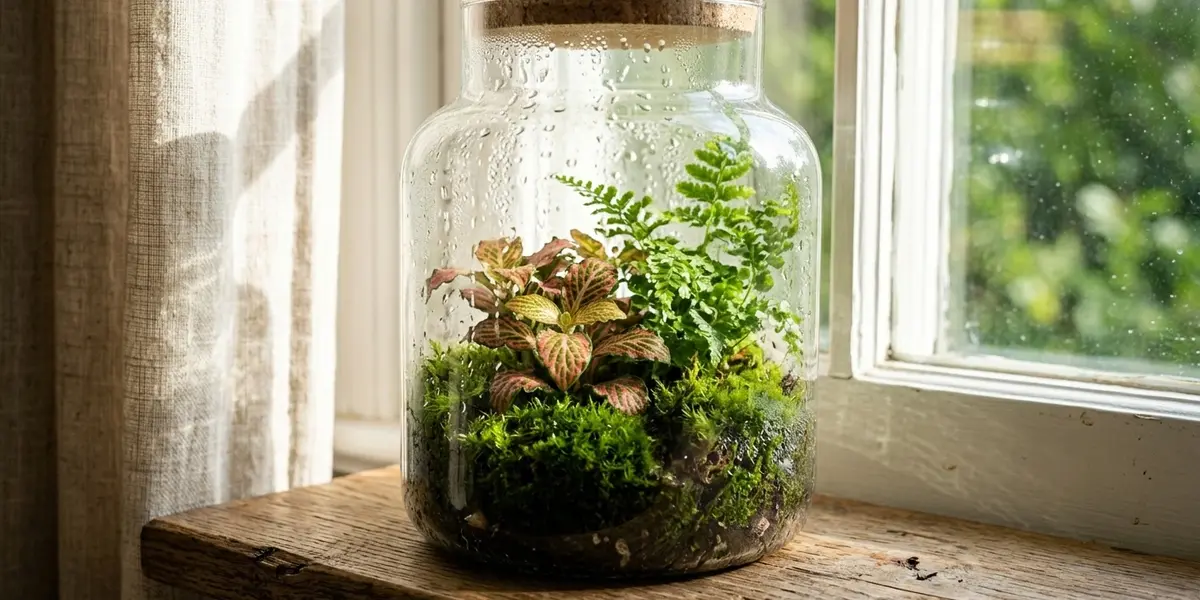
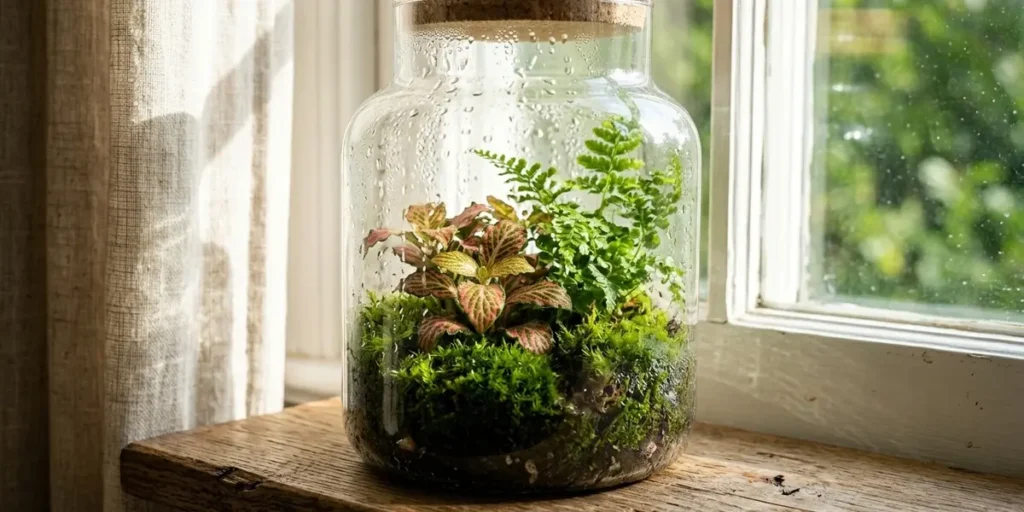
Picture a glass jar on a shelf, two years old, green and damp, that nobody has watered since last spring. Moss carpets the floor. A fittonia leans toward the window. Drops of water slide down the glass and vanish into the soil.
That’s what a working self sustaining terrarium looks like. Water leaves the soil as vapor, collects on the cooler glass as droplets and runs back down to the roots. The plants turn light into growth while the jar reuses the same water again and again.
You can build one in an afternoon. What decides whether it survives is everything that comes after. This guide has 9 build steps plus a long section on reading the glass, because that’s the skill that keeps a sealed jar alive past its first summer. I also checked every plant on the list against extension and botanical garden guidance, and I point out where popular advice (charcoal, mostly) has thin evidence behind it.
Key takeaways
- A sealed terrarium recycles its own water through evaporation, condensation and runoff.
- Plant choice and light decide survival far more than the layers do.
- Small humidity lovers work best: moss, fittonia, small ferns, selaginella and compact peperomia.
- Succulents, cacti and fast growers fail in a sealed jar.
- Bright indirect light only. Direct sun turns a closed jar into an oven.
- Read the glass. A light film is good. Heavy droplets mean open the lid. Clear glass plus dry soil means add a little water.
- Activated charcoal is optional. I found no solid evidence that it keeps a sealed jar fresh.
- After the first 6 weeks most jars need attention about twice a year.
Why a sealed jar works at all?
Think of the jar as a tiny room with no door for water to escape through.
Water starts in the soil. Roots pull it up and leaves release part of it as vapor through transpiration. The soil surface gives off more. Inside a sealed container that vapor has nowhere to go. It hits the cooler glass and turns back into liquid. Gravity does the rest.
Then the loop starts again.
The most famous example is David Latimer’s bottle garden. He planted it in 1960 in a large glass carboy, watered it once in 1972, and sealed it. According to news coverage, the plants kept growing for decades behind the glass. I wouldn’t promise that result for a first build, but it does show the cycle can run for a very long time.
Humidity balance is the idea to hold onto. Too much water and the glass stays soaked, the leaves stay wet and mold shows up. Too little and the glass stays clear while the soil dries and the plants droop. A film of condensation that comes and goes through the day is the sweet spot. It tells you water is moving.
That’s also why a good closed jar can go months without watering. The water never left. Most people find that hard to believe until they’ve watched one for a full season.
Pick the glass vessel first
Choose the glass vessel before you buy a single plant. The jar sets the rules for everything after it.
Start with one question: can I get my hand or a tool inside later? Dead leaves need pulling. Fast stems need trimming. A plant that outgrows the jar has to come out. A narrow neck bottle looks beautiful and turns each of those jobs into surgery with chopsticks. I love them as photographs. For a first build I’d pick a wide mouth jar.
Size matters more than people expect. A very small container swings from wet to dry within days and leaves no room for mistakes. A jar that holds at least 1 gallon (about 4 liters) gives the water cycle space to settle. Bigger is more forgiving until the day you can’t lift it.
Pick clear glass. Tinted or frosted glass cuts light and hides what’s going on inside. You want to see the soil line and every leaf.
The lid has to seal well enough to hold humidity. It doesn’t need glue. You’ll lift it during the first weeks and again whenever condensation turns heavy. A cork on a bottle or a lid with a rubber gasket both work. A loose plate on top lets too much vapor out and the jar behaves like an open one.
Open terrariums and succulent arrangements are a different build with different plants. This guide stays with sealed jars.
The layers and what each one does
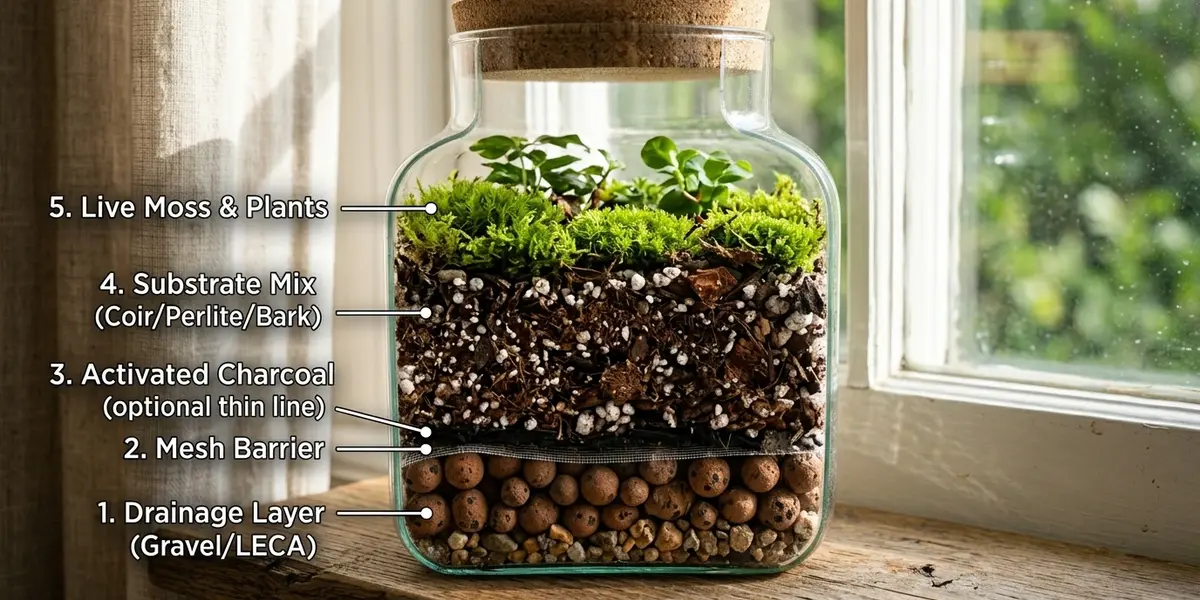
Every terrarium guide spends its word count here. The layers matter less than the plants and the light so I’ll keep this tight.
Drainage layer
About 1 inch (2.5 cm) of clean gravel, LECA, or pumice at the bottom. A sealed jar has no drain hole and this layer doesn’t pull water out of the soil. Penn State Extension notes that the drainage layer acts to mimic bedrock and allow excess water to pool away from soil. Think of it as a small reservoir that gives excess water somewhere to sit. Keep it thin because every inch of gravel is an inch your roots can’t use.
Barrier
A piece of fine plastic mesh or a thin sheet of sphagnum moss. It stops substrate from sifting into the gravel each time you move a plant.
Activated charcoal
This one gets oversold. Charcoal is traditional and it can adsorb some dissolved compounds and odors. I couldn’t find terrarium-specific evidence that a thin layer keeps a sealed jar fresh or prevents mold. Penn State Extension guidelines list charcoal as strictly optional. It’s cheap and harmless though. A quarter-inch (about 6 mm) of horticultural charcoal is fine if you want the traditional build. Leave it out, and your jar will be fine too.
Growing medium
2 to 3 inches (5 to 7 cm) for small plants. The mix comes next.
Moss layer
A thin carpet of live moss over bare soil looks natural and loves the humid air. Leave gaps so you can still see soil. A thick wet blanket holds too much water.
None of these depths are sacred. Damp soil and the right light will beat a perfectly measured cross section every time.
The substrate mix
Ordinary potting compost is usually too rich and too dense for a sealed jar. Rich soil pushes fast growth. Dense soil compacts under constant moisture and starves roots of air. Garden soil is worse because it carries seeds, fungus spores and insects that love a warm damp box.
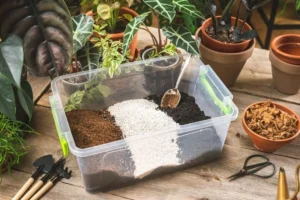
Penn State Extension recommends a low fertility soilless mix for closed terrariums. Here’s the mix I’d start with:
- 2 parts peat-free potting mix or coco coir
- 1 part fine orchid bark
- 1 part perlite or pumice
Coir or potting mix holds the water. Bark keeps the mix open so roots can breathe. Perlite or pumice makes air pockets so roots aren’t sitting in a wet brick.
Treat the ratio as a starting point. If your mix feels heavy and clumps when damp, add more bark or perlite. If it dries into dust, add coir. Mix it in a bucket first and moisten it before it goes near the jar. Dry coir repels water at first. A jar filled with dry mix and then watered ends up with wet patches and dry pockets.
Skip fertilizer. Iowa State University Extension notes that fertilizer should be avoided in terrariums because it encourages rapid growth that will quickly outgrow the space. A sealed jar recycles nutrients from dead leaves, and extra feed only speeds up growth you’ll be trimming later.
Plants that survive in a sealed jar
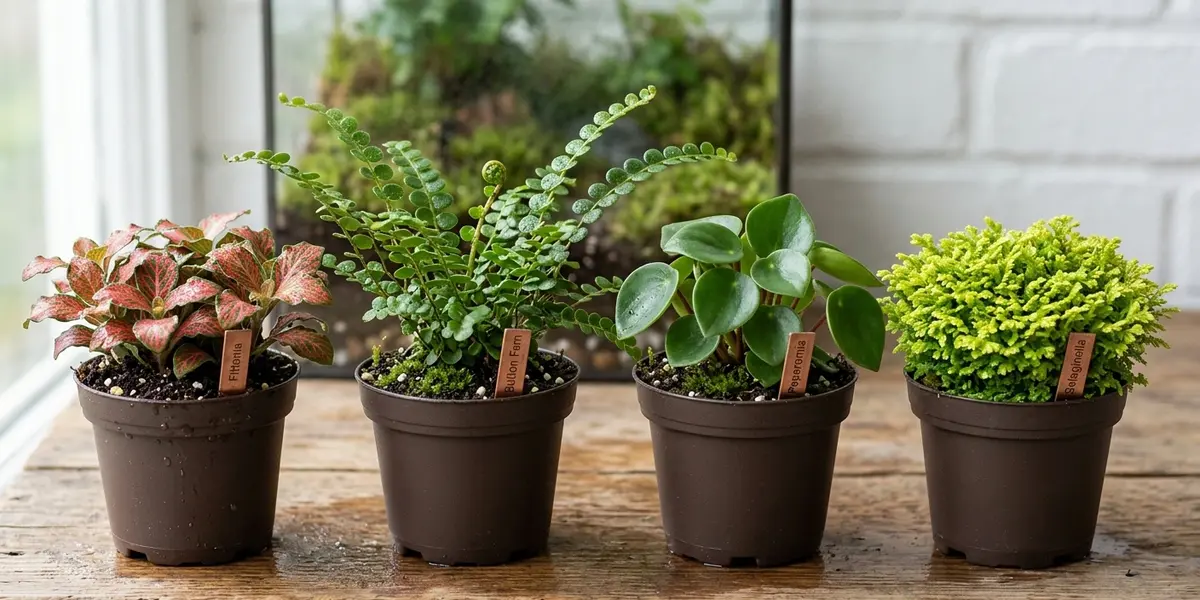
This is where most jars fail. A plant can handle a few weeks of humidity and still be wrong for a sealed box over a year. The ones that work like constant humidity. They also stay small or tolerate being cut back and cope with indirect light. Extension and RHS guidance point to the same short list.
Moss
The easiest floor cover. It grows slowly and stays green in medium light. Over a year it spreads a little and may need trimming back from the glass. Buy it from a trusted grower because wild moss can bring pests along.
Fittonia (nerve plant)
My pick for a first jar. It stays low and spreads with brightly veined leaves. It wilts dramatically when dry and perks back up after a drink, which makes it a handy warning signal. Expect it to creep across the floor over a year. Pinch the tips to keep it dense.
Small ferns
Button fern (Pellaea rotundifolia) stays compact. Check the species on any fern label before buying. A fern sold as tiny can reach 2 feet wide within a year.
Selaginella (spikemoss)
Soft and low with a mossy look. It wants high humidity. Some kinds spread fast and need a trim every few months.
Peperomia
Compact kinds such as Peperomia caperata or the trailing string of turtles (Peperomia prostrata) grow slowly and hold their shape for a year or more. The genus is huge so confirm the species first.
Small begonias
Some dwarf types fit a large jar. Their leaves rot where they touch wet glass so keep them toward the center. The American Begonia Society advises extra cleanliness when establishing begonias in terrariums because closed air encourages disease.
Now the exclusion list. Cacti and succulents rot in permanent humidity. Anything that wants a dry rest, like lavender or many herbs, declines. Fast growers fill the jar in a season: creeping fig, baby’s tears and polka-dot plant all need constant cutting. Pothos and philodendron outgrow most jars within months.
Check the mature size of every plant on a database like the Missouri Botanical Garden Plant Finder. The size on the nursery tag shows the plant today and says nothing about next year.
Build it in 9 steps
- Clean everything. Wash the jar, tools and gravel in hot soapy water. Rinse and dry. A warm sealed box is a perfect home for stray fungus.
- Moisten the substrate. Squeeze a handful. It should hold a loose shape and release a drop or two. Water streaming out means too wet. Dusty crumbs mean too dry.
- Add the drainage layer. About 1 inch. Level it with your hand.
- Lay the barrier. Mesh or a thin moss sheet covering the gravel edge to edge.
- Add charcoal if you want it. A thin sprinkle is enough.
- Add substrate. 2 to 3 inches. Slope it so the back sits higher than the front.
- Plant. Put the tallest plants at the back. Tease the roots loose and shake off most of the nursery soil because it can carry fungus gnats. Keep each crown at its original level. Leave 1 to 2 inches between plants.
- Add moss and decor. Press moss around the stems. Rinse any stones or bark before they go in.
- Clean the glass and water. Wipe soil off the inside with a damp cloth. Pour water slowly down the glass so it rinses the walls. The soil should look damp without pooling. Then seal the lid.
If you’re unsure how much water, use less. Adding more later is easy. Removing it from a sealed jar is not.
The first 6 weeks
The first weeks look different from a mature jar. Plants may droop a little after the move. A leaf or two may yellow and drop. Condensation patterns change from day to day.
That’s normal. Pull dead leaves out with tweezers and leave everything else alone. Opening the lid every few hours because you’re nervous only resets the water cycle.
Watch the trend. Upright plants, lightly damp soil and condensation that comes and goes mean the system is settling. New leaves around week 3 to 6 are a very good sign.
Light is where most jars die. Bright indirect light is the target: near an east window or a few feet back from a south or west window. Never leave a sealed jar in direct afternoon sun. Glass traps heat and a jar in full sun can get hot enough to cook the leaves in a few hours. If your room is dim, a small LED grow light on a timer for 8 to 12 hours a day works well.
How to read condensation?
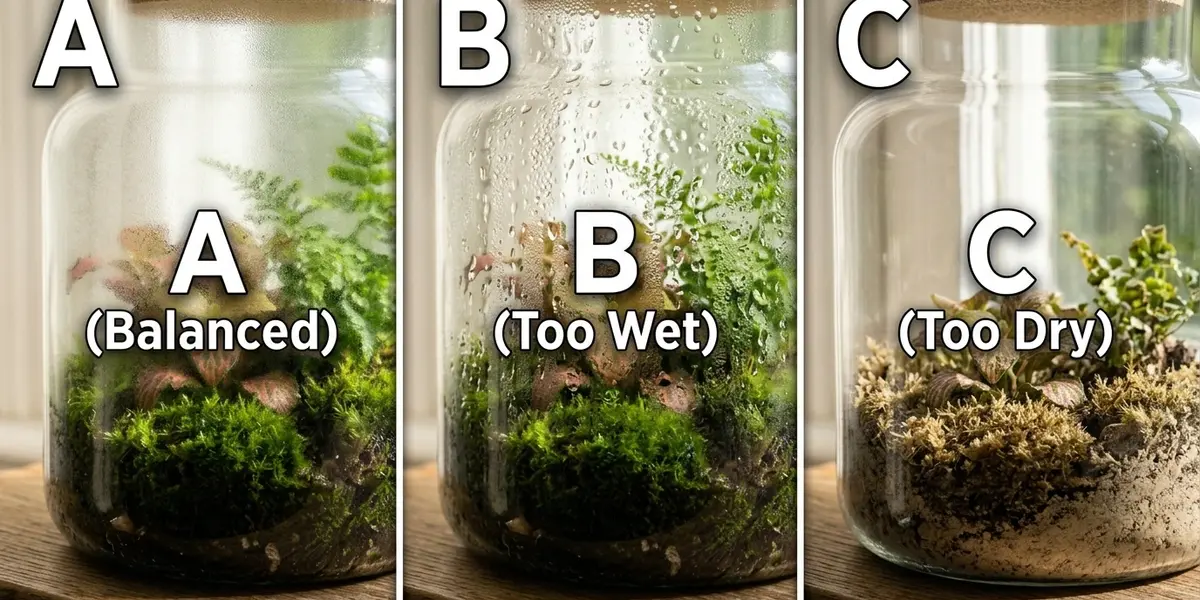
This is the skill that keeps a jar alive. Learn it and you can ignore every watering calendar.
One timing tip: condensation naturally peaks in the morning after a cool night and fades by afternoon. Judge the jar at midday so you’re seeing its typical state.
Correct. A light film or a scatter of small droplets on the glass. Leave the lid closed. This is the system working.
Too wet. Big droplets everywhere and the plants hard to see. Take the lid off for an hour and check again. If the glass fogs heavily after closing it, leave it off longer, up to a day. Extension guidance suggests about a day for very wet jars. You’re aiming to reduce the excess and the soil can stay damp.
Too dry. The glass stays clear for days, the soil looks pale and plants wilt. Add a small amount of water, a spoonful at a time down the glass, then reseal and watch. RHS guidance treats lack of condensation as one sign a jar needs water.
Clear glass alone proves nothing. Check the soil and the plants. A clear jar with damp soil and happy leaves needs no help.
Long term upkeep
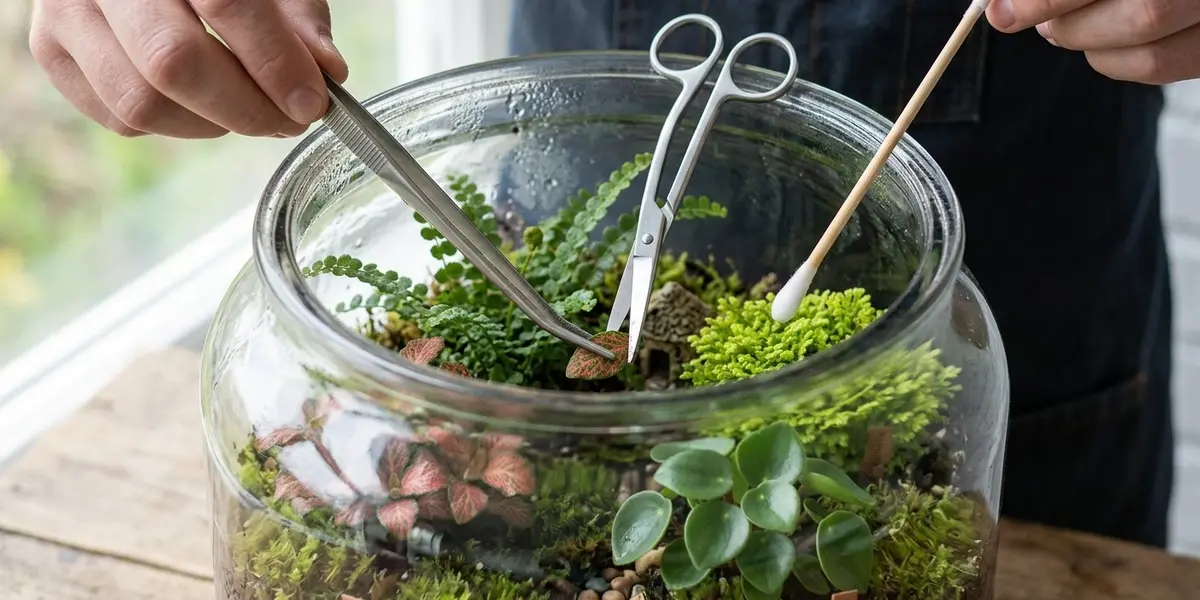
A healthy sealed jar shouldn’t need daily attention. That’s why people love them. Self sustaining still means you check on it now and then.
My terrarium maintenance routine after the first 6 weeks looks like this:
- Prune. Use long tweezers or small scissors through the opening. Trim anything pressing on the glass or crowding a neighbor. Remove a plant that has outgrown the jar rather than rebuilding around it.
- Keep leaves off the glass. Mississippi State Extension warns that foliage resting on wet glass invites disease.
- Wipe algae. A film of green on the glass is common. Wipe it with a clean cloth. Heavy algae usually means too much light plus too much moisture.
- Deal with mold. White fuzz on dead leaves or bark in the first few weeks is common. Lift out the affected bit with tweezers and leave the lid off for a few hours.
- Springtails. These tiny soil insects eat mold and decaying matter. They help in some jars. You don’t need them to make a simple plant terrarium work.
- Skip fertilizer. Iowa State and Mississippi State both advise against routine feeding in closed systems.
Realistically a good jar needs a proper look about twice a year. Some need a splash of water every few months and others go much longer. A fixed schedule is less useful than knowing what balanced looks like in your jar.
When to rebuild
Sometimes a jar isn’t failing. It has simply finished its first arrangement.
One plant has taken over. Growth covers the glass. The roots have filled all the soil. At that point rebuilding makes more sense than endless trimming.
Take out the healthy plants you want to keep. Throw away anything rotten. Wash the jar and refresh the substrate. Then replant with fewer or smaller plants. A closed terrarium can last for years but each plant doesn’t get a lifetime contract.
What to do today
Don’t buy 10 plants. Buy one clear jar with a wide mouth and 3 small humidity lovers.
Build it with less water than you think you need. Put it in bright indirect light. Look at the glass at midday tomorrow and again the next day. If you see a light film, leave it alone.
FAQs
How long can a closed terrarium go without water?
Weeks to years depending on the jar, plants and light. Many go several months. Water only when the soil looks pale and the glass stays clear for days.
Should I use tap water?
In hard water areas, tap water leaves white mineral crust on glass and soil. Distilled, filtered or rainwater keeps the jar cleaner over time.
Why are the leaves in my terrarium turning yellow?
A yellow leaf or two in the first weeks is normal after the move. Many yellow leaves usually mean too much water or too little light.
Can I use cuttings from my houseplants?
Small cuttings of slow growers like peperomia can work. Vigorous vines like pothos fill a jar quickly and need constant cutting.
Can a terrarium live in a dim room?
A sealed jar needs light to feed the plants. A small LED grow light on a timer works in a dim room.