Peace lilies are popular houseplants known for their elegant appearance and ability to thrive in low-light conditions. However, like all plants, they need proper care to continue flourishing. One important part of peace lily care is repotting. This guide will take you through everything about repotting peace lily plants such that your green friend stays healthy and vibrant.
Why Repotting Peace Lily Is Important 🌱🔄
The repotting of peace lilies upholds their overall health. With time, the peace lilies may become potbound, i.e., its roots will be too large for the pot it is growing in at present. This can lead to various problems, such as:
Plant Growth Inhibition: Nutrients and water are not well absorbed by the plant due to root congestion leading to poor growth.
Poor Drainage: Soil with excessive roots blocks drainage holes causing waterlogged soil which results in root rot.
Nutrient Depletion: The soil in the pot loses its nutrients over time, and fresh soil is needed to feed the plant.
By repotting your peace lily you provide more space for growth of new leaves and prevent potential problems associated with being root-bound by giving it fresh soil full of natural nutrients.
When To Repot Your Peace Lily? 📅⏰
Knowing when you should repot your peace lily is important so as to maintain its ongoing health. Here are some signs that it’s time to repot:
Roots Growing Out of the Drainage Holes 🌀🪴
When sprouts from under drainage holes appear on your pot’s bottom side then this shows that your peace lily has outgrown its current home.
Soil Dries Out Quickly 💧⏳
When the soil dries out faster after watering, it could mean that the roots have occupied too much of the pot space, leaving very little room for water retention.
Stunted Growth 🚫📏
In spite of being given enough care your peace lily is not growing as fast as it did? It could be root bound and requires repotting.
Crowded or Wilting Leaves 🍂🚶♀️
Should you notice overcrowding in your plant or wilting leaves despite proper watering, then it might be a signal that the plant requires more space to grow.
It’s Been Over Two Years ⏲️🗓️
Even without observing any of these signs above two years should be a good duration to repot your peace lily. This way you can replace old soil with new one and give it a completely different environment to thrive in.
How to Repot a Peace Lily: Step-by-Step Instructions 🪴🔧

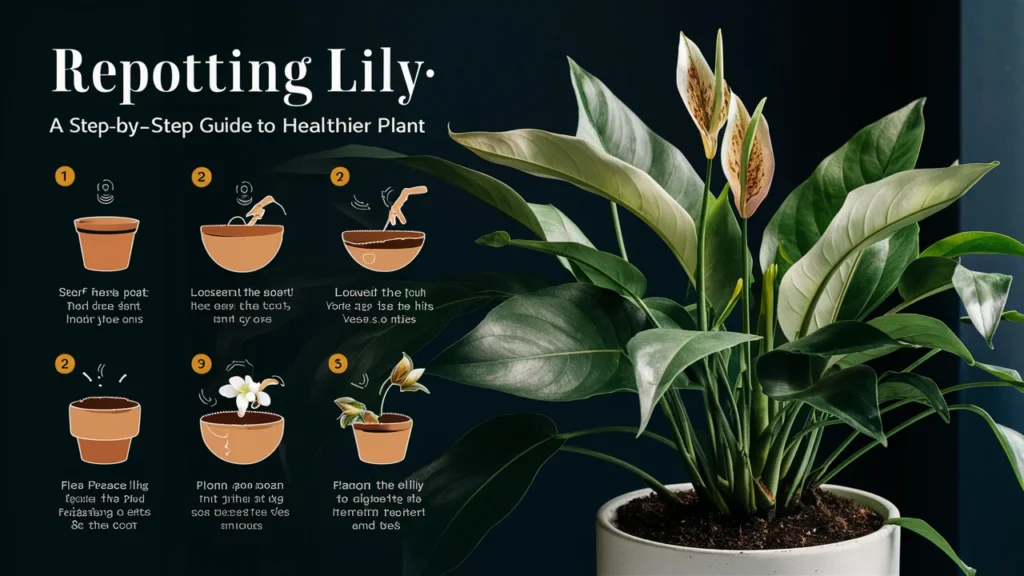
To repot peace lily plants is not an intimidating job. Use these steps to guarantee a smooth and successful repot:
Choose the Right Time 🕰️🌤️
The best time for re-potting peace lilies is during spring or early summer when they are on their active growth phase; this timing allows them to recover quickly and take full advantage of their new spaces.
Select the Right Pot 🪴📏
Choose a new container that has 1-2 inches wider diameter than the old container. Ensure that there are drainage holes at its bottom so water does not accumulate which leads to rotting of roots after all.
Get Ready Fresh Seed Compost 🪴🌿
Get a high-quality potting mix that is well-drained and suited for indoor plants. A combination of peat moss, perlite, and compost is perfect for peace lilies. Avoid using garden soil which can become too compacted and retain excess moisture.
Take the Plant out of its Present Pot 🌱🛠️
Turn pot on side easily, sliding out the peace lily while being cautious. In case it doesn’t come off easily, you can knock the sides of the pots gently or use a knife to loosen up the soil at its edges.
Check Roots and Cut 🧑🌾✂️
Look at the root ball carefully for signs of damage or rotting. Trim off any roots that are brown or slimy using sterilized scissors. If the roots have grown together tightly then separate them apart softly so that they can grow again in future.
Put Plant in New Pot 🪴📍
Now put some fresh seed compost down into the bottom of your newly acquired pot. The peace lily should be placed in the middle with an inch left between its upper part and rim of this new one. More seed compost should be added around roots with slight pressing down to eliminate air pockets.
Watering Well 💧🌧️
Water plant thoroughly until water drips from drainage holes after repotting process is over with this plant now being in another container. This will help settle soil as well as provide necessary moisture to allow root systems adjust to their new surroundings.
Putting it at Right Place 🪴🌞
Return your peace lily back to where you usually keep it; with indirect light being most preferable location for this purpose only avoid direct sunshine on it because this could scorch leaves away when placed outside directly. Ensure it is doing well in its new pot for a couple of weeks.
Looking After Your Plant after Repotting 🌿💚
Repotting can be quite hard on your plant, so make sure to give it extra attention during the following weeks. Here are some tips to help it settle:
Keep Soil Moist: Make sure that soil remains continuously moist but not too wet. Over-watering leads to root rot while under watering causes wilting.
No Immediate Fertilizer: Allow a month or two before you begin regular fertilizer application for your peace lily in its new pot this will allow the roots to establish themselves without adding any more stress by nutrients.
Watch for Signs of Distress: Look out for signs like yellow leaves or drooping which may indicate that things aren’t going well with your plant. If you notice something amiss, simply adjust your care regime so as to provide just enough water and light required by the plant.
Conclusion:
Repotting peace lilies is essential in their growth process as it ensures they have enough space and nutrients necessary for them to thrive. By following the steps outlined in this guide, one will be able to successfully repot their peace lily and enjoy its beauty forever.
Remember that healthy plants not only add beauty but also contribute towards happier and more vibrant homes. With a little love and care, your peace lily can be an amazing addition to any indoor garden space.

