Did you know proper planting techniques make all the difference between thriving plants and garden disappointments? When you plant with care and attention in the garden, the results speak for themselves. “The more work you put in to preparing the soil, the better the results will be.”
Most beginner gardeners make one common mistake: digging a tiny hole and dropping the plant in. Successful in-ground planting needs more care! Plants typically require 6-8 hours of direct sunlight daily, and good soil drainage is essential for survival. Most plants prefer a slightly acidic soil pH of around 6, although some require even greater acidity.
Feeling overwhelmed? Don’t be. Start small! A 10×10-foot garden (100 square feet) gives beginners the perfect manageable space. Remember: “It’s better to be proud of a small Plant Plants in the Garden than be frustrated by a big one!”
We’ve compiled all the essential steps for a successful garden. From the ideal soil mix (70% native soil, 30% amendments) to digging holes twice as wide as your plant container, we’ll guide you through every step.
This guide shows you exactly how to transform your outdoor space with plants that not only survive but thrive, bringing you joy as you watch them grow.
Finding Your Perfect Plant Match
Success in gardening begins well before your first shovel of soil. Selecting plants that thrive in your garden’s specific conditions lays the foundation for successful beginner gardening.
Light & Soil Essentials
Light exposure has a direct impact on how your plants grow. Most plants have specific light needs:
- Full sun: At least 6 hours of direct sunlight daily
- Part sun/part shade: Between 3-6 hours of direct sun per day
- Full shade: Less than 3 hours of direct sun daily
Watch your garden throughout the day to map sun patterns. Morning sun tends to be gentler than afternoon rays, making spots with afternoon shade better for sensitive plants.
Your soil type determines what will thrive in your space:
Your soil type determines what will thrive in your space. Sandy soils, which are light and drain quickly, hold fewer nutrients. Clay soils, on the other hand, are heavy and hold water and nutrients well, but often become compacted. Loamy soils, which are composed of a blend of sand, silt, and clay, are generally ideal for most plants. Understanding your soil type is crucial as it helps you make informed decisions about what to plant and how to improve your soil’s condition.
Climate & Season Smart Choices
Your location determines your hardiness zone, which indicates the lowest temperatures that plants can survive in your area. Always check plant labels to ensure they can withstand your zone’s winter temperatures.
Timing matters too! Fall is actually an ideal time for planting many trees and shrubs. The soil remains warm while the air cools, allowing roots to establish before winter.
Your property has mini-climates that affect what grows where. South-facing walls create hotter, drier spots, while north-facing areas stay cooler with moister soil. These variations let you grow plants that might struggle in your broader climate zone, giving you the confidence to experiment with different plant varieties.
Native plants have evolved to suit local conditions over thousands of years, making them naturally well-adapted to the climate, soil, and rainfall of your region. They require less care once established, making them ideal for beginner gardeners.
Soil Prep: The Foundation for Plant Success
Image Source: JoeGardnerer
Great planting starts beneath the surface. Your soil can make or break your plant’s ability to thrive, especially when planting in the ground for the first time.
Know Your Soil Before You Grow
Get your soil tested before adding any amendments. A soil test reveals crucial information about pH levels, nutrients, and organic matter. Most vegetables prefer soil with a pH between 6.0 and 7.2, with a pH of 6.5 being ideal for most garden plants. Soil testing is like a health check for your garden. It helps you understand your soil’s current condition and identify any necessary improvements, ensuring you provide the optimal growing conditions for your plants.
Your testing options include
- Professional lab testing through county extension offices ($15 typically)
- DIY home test kits from garden centers
- Basic pantry tests for quick pH checks
Testing helps you make smart choices instead of guessing what your soil needs. For acidic soil, add limestone to raise the pH. For alkaline soil, sulfur helps lower the pH.
Break Up Compacted Soil
Compacted soil is akin to a brick wall, hindering plant roots from growing and impeding nutrient flow. When soil particles press together, air pockets collapse, blocking water movement and potentially suffocating roots.
For small areas:
- Gently work organic matter in with a digging fork to 6-8 inches deep
- Create pathways for air, water, and roots while preserving natural soil layers
For severely compacted spots, try:
- Core aerating to create air passages
- Adding earthworms to create natural tunnels
- Planting deep-rooted cover crops like lupines that break up the soil naturally
Feed Your Soil Right
Add 2-3 inches of compost to improve both clay and sandy soils. For new veggie beds, work 3-4 inches of compost into the top 8-12 inches of soil. Established beds need just ¼ to 1 inch annually.
Fall is actually perfect for adding compost, as it gives the material time to break down before spring. During this time, soil microbes convert organic matter into plant-ready nutrients.
If soil tests show specific deficiencies, add targeted fertilizers. Without soil tests, vegetable gardens generally need 2-3 pounds of 10-20-10 fertilizer per 100 square feet. Remember that good compost reduces the need for additional fertilizers while building healthier soil.
Plant the Right Way
Proper planting technique turns struggling plants into thriving garden stars. Let’s explore how to give your green friends the best possible start.
The Perfect Planting Hole
Your planting hole dimensions make or break future growth. Dig a hole 2-3 times wider than your plant’s root ball. This extra width gives emerging roots room to spread horizontally through loose soil.
Depth matters differently than most gardeners expect! Make your hole no deeper than the root ball, slightly shallower works even better. It keeps the root flare (where the trunk widens at the base) sitting somewhat above ground level, preventing rot and disease. The root flare is a critical part of the plant that should not be buried, as it can lead to health issues for the plant.
Working with compacted soil? Dig an even wider and shallower hole. A saucer-shaped hole with gently sloping sides encourages roots to grow outward rather than circling.
Fix Those Circling Roots
Before planting, check the root ball carefully. Nursery plants often develop circling roots that can eventually strangle the plant if not corrected.
For potted plants:
- Remove the container and gently loosen the outer roots
- Soak severely tangled roots in water overnight
- Cut any circling roots, especially those thicker than a pencil
For balled and burlapped plants, remove the wire, cord, and the top one-third of the burlap after positioning. In poorly drained soil? Remove all burlap completely.
Position & Backfill Properly
Place your plant in the center of the hole with the root flare at or slightly above ground level. Never bury the trunk flare under soil!
When backfilling:
- Use the same soil you removed (skip the amendments)
- Fill halfway, then water thoroughly to eliminate air pockets
- Complete filling, gently firming the soil with your hands (not feet)
- Form a 2-3 inch soil ring around the planting area to create a water-catching basin
Water your newly planted friend thoroughly as soon as possible. It settles the soil and provides the crucial first drink to help your plant establish.
After-Planting Care: Watering & Mulching
The way you care for your plants right after planting makes all the difference between Plants in the Garden that merely survive and those that truly thrive. Great post-planting care helps establish strong roots for years of healthy growth.
Water Your New Plants Right
Newly planted trees and shrubs need consistent moisture while establishing their root systems. Check soil moisture daily during the first two weeks and water deeply when the top feels dry. Follow this simple schedule:
- First 1-2 weeks: Water daily
- 3-12 weeks: Water every 2-3 days
- After 12 weeks: Water weekly until roots establish
Direct water straight to the root ball! For trees, use 1-1.5 gallons per inch of stem caliper each time you water. Create a 3-4 inch soil ring around your plant to form a water-catching basin that lets moisture soak in slowly.
Morning watering works best! It maximizes absorption while reducing evaporation. Remember, deep, infrequent watering encourages stronger roots than frequent light sprinkles.
Mulch Like a Pro
Apply a 2-3 inch layer of organic mulch around newly planted trees and shrubs, extending several feet beyond the canopy. Keep the root ball top bare – start mulching at the outer edge to prevent stem rot.
Proper mulching does so much more than retain moisture:
- Keeps soil moisture from evaporating
- Stops weeds from taking over
- Protects roots from temperature swings
- Prevents soil from getting compacted
Don’t go overboard! More than 3 inches of mulch can block water from reaching roots, reduce oxygen levels, and create cozy homes for bark-chewing rodents.
Spot Trouble Signs Early
Wilting leaves? Check soil moisture 6 inches deep before assuming your plant needs water. Dry soil means water thoroughly – plants should perk up within 24 hours. Soggy soil causes oxygen deprivation that also results in wilting.
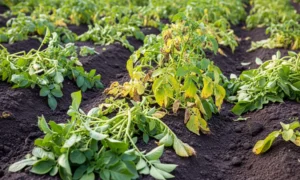
Yellow leaves typically indicate either overwatering or underwatering. Feel the soil and examine leaf texture – underwatered leaves feel dry and crispy, while overwatered leaves look soft and mushy.
Brown leaf tips on plants in the garden often indicate inconsistent watering or fertilizer burn. Maintain a regular watering schedule and ensure proper drainage
Don’t panic about temporary wilting during heat waves or right after planting – it’s normal! Shield new seedlings from harsh sun and wind until they settle in.
Welcome to Our PLANT FAMILY
Successfully planting in-ground comes down to understanding what nature requires. Throughout this guide, we’ve explored the essential steps that transform beginners into confident plant parents.
From selecting the right plants to preparing the soil properly, each step builds on the last to create an environment where plants thrive, rather than merely survive. By learning how to plants in the garden effectively, you set the stage for a flourishing outdoor space.
Remember that gardening blends science with art. While you now understand the technical aspects of digging proper holes and caring for root systems, patience remains just as important. Most plants need time to establish before showing their full potential. Some individuals may struggle despite your best efforts, but these experiences provide valuable insights for future gardening success.
The benefits of properly planted gardens extend far beyond their aesthetic appeal. Well-established plants require less maintenance, conserve water, and provide habitats for beneficial wildlife. During your garden journey, keep a simple journal to track what works in your specific space. This practice enables you to develop an understanding of your unique microclimate and soil conditions over time.
Don’t forget that gardening is meant to bring joy! Whether you’re planting a tiny herb patch or transforming your entire yard, nurturing plants in the garden fosters a special connection with the natural world. Start small, follow these planting fundamentals, and watch your garden gather life season after season.


