Peace lilies (Spathiphyllum) are known for their elegant green leaves and striking white blooms, making them a popular choice for indoor plant lovers. However, like any plant, peace lilies are susceptible to certain problems, one of the most common being root rot. Peace lily root rot is a serious issue that can quickly damage or even kill your plant if not addressed promptly. In this article, we’ll delve into the causes, symptoms, and effective treatment methods for peace lily root rot, ensuring your plant stays healthy and vibrant.
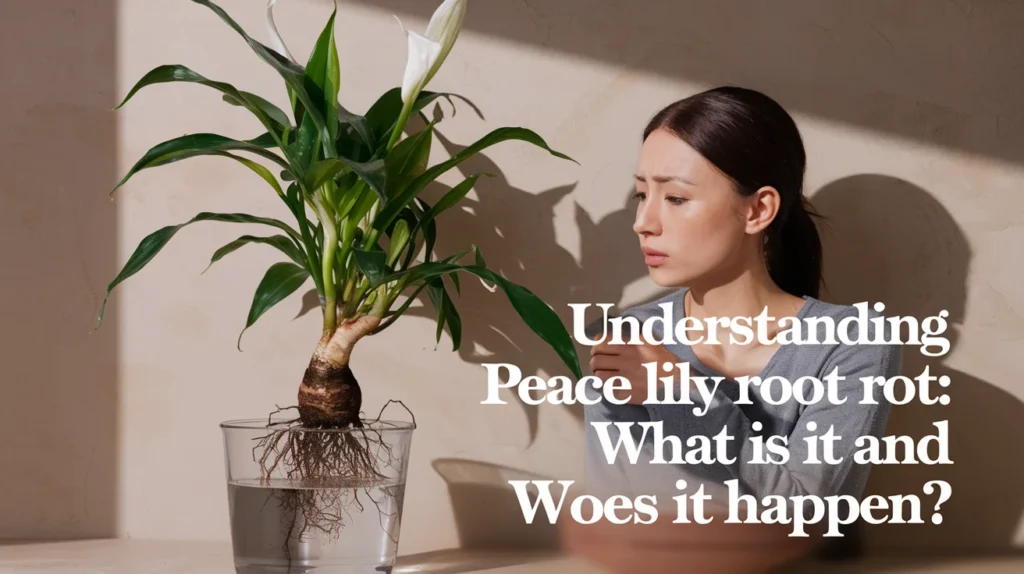
Understanding Peace Lily Root Rot: What Is It and Why Does It Happen? 🌱💧
Peace lily root rot occurs when the plant’s roots are exposed to excess moisture for extended periods, leading to the decay of the root system. This condition is primarily caused by overwatering, poor drainage, or using soil that retains too much water. When the roots sit in soggy soil, they are deprived of oxygen, which is essential for their health. As a result, the roots begin to rot, turning brown or black and becoming mushy.
Root rot is a severe condition because the roots are responsible for absorbing water and nutrients from the soil. When they are damaged, the plant cannot sustain itself, leading to wilting, yellowing leaves, and eventually, plant death if left untreated.
Causes of Peace Lily Root Rot: How Does It Start? 🌧⚠
1. Overwatering 💧🌾
The most common cause of peace lily root rot is overwatering. Peace lilies prefer consistently moist soil, but too much water can drown the roots. It’s important to water your peace lily only when the top inch of soil feels dry. Overwatering, especially in pots without proper drainage, can quickly lead to root rot.
2. Poor Drainage 🚱🪴
Even if you’re careful not to overwater, poor drainage can still cause peace lily root rot. If your pot lacks drainage holes, excess water has nowhere to go and will accumulate at the bottom, creating the perfect environment for root rot. Always use a pot with drainage holes and consider adding a layer of gravel or small stones at the bottom to improve drainage.
3. Inappropriate Soil Mix 🌿🥀
The type of soil you use can also contribute to peace lily root rot. Heavy, clay-like soils that retain too much water are not suitable for peace lilies. Instead, opt for a well-draining potting mix that allows excess water to flow through easily. Adding perlite or sand to the soil mix can improve its drainage properties.
4. Compacted Soil 🌱🌾
Over time, soil can become compacted, reducing its ability to drain water effectively. Compacted soil can trap water around the roots, leading to peace lily root rot. To prevent this, regularly aerate the soil by gently loosening it with a fork or by repotting your plant every year or two.
Symptoms of Peace Lily Root Rot: How to Identify the Problem Early 🍂🔍
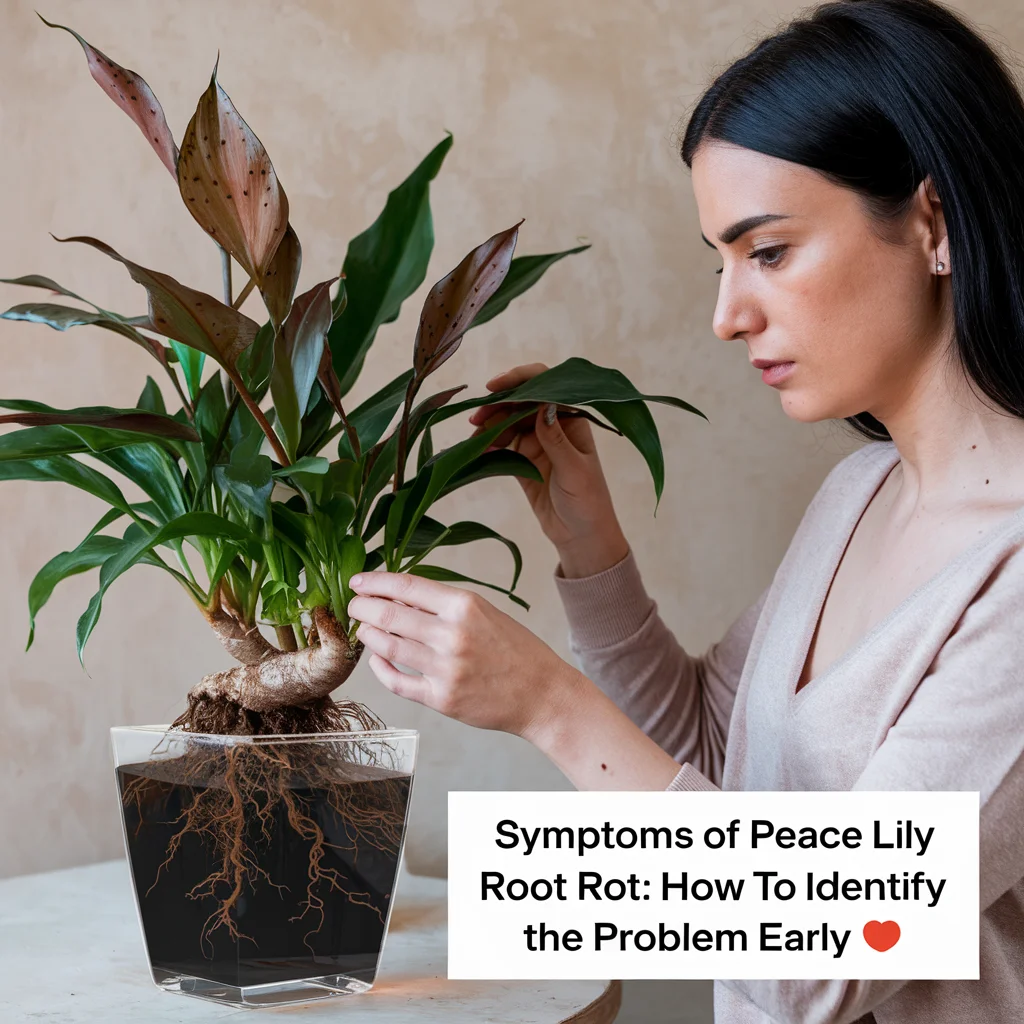
Recognizing the symptoms of peace lily root rot early is crucial for saving your plant. Here are the key signs to watch out for:
1. Wilting Leaves 🌿🍂
One of the first signs of peace lily root rot is wilting leaves. Despite being watered, the leaves may droop and appear lifeless. This occurs because the damaged roots can no longer absorb water effectively.
2. Yellowing Leaves 🍃🌻
Yellowing leaves are another common symptom of peace lily root rot. As the roots decay, the plant struggles to take up essential nutrients, leading to nutrient deficiencies that manifest as yellow leaves.
3. Mushy or Discolored Roots 🌾👀
If you suspect peace lily root rot, carefully remove the plant from its pot and inspect the roots. Healthy roots should be firm and white or light tan. If the roots are brown, black, and mushy, it’s a clear sign of root rot.
4. Foul Odor 👃🪴
A foul, musty odor emanating from the soil is a strong indicator of peace lily root rot. The smell is caused by the decaying roots and the presence of anaerobic bacteria that thrive in waterlogged soil.
How to Treat Peace Lily Root Rot: Steps to Save Your Plant 🛠🌱
If you’ve identified peace lily root rot, swift action is necessary to save your plant. Follow these steps to treat the issue:
1. Remove the Plant from Its Pot 🪴⚖
Carefully remove your peace lily from its pot to inspect the extent of the root rot. Be gentle to avoid damaging the roots further.
2. Trim Away Affected Roots ✂🌾
Using sterilized scissors or pruning shears, trim away any mushy, discolored roots. Be sure to cut back to healthy, firm tissue. It’s better to remove too much than too little, as any remaining rot can spread to healthy roots.
3. Wash the Roots 💧🧼
Gently wash the roots under lukewarm water to remove any remaining soil and decayed material. This will help prevent the spread of rot when you repot the plant.
4. Repot in Fresh Soil 🪴🌱
Repot your peace lily in fresh, well-draining potting mix. Choose a pot with drainage holes and consider adding a layer of gravel at the bottom to improve drainage. Ensure the plant is positioned at the same depth as before.
5. Adjust Watering Habits 🌿💧
After repotting, adjust your watering habits to prevent future peace lily root rot. Water the plant only when the top inch of soil feels dry, and ensure excess water drains away quickly. Consider using a moisture meter to avoid overwatering.
Preventing Peace Lily Root Rot: Best Practices for Healthy Growth 🌱💚
Preventing peace lily root rot is easier than treating it. Here are some best practices to keep your peace lily healthy and rot-free:
1. Water Wisely 💦🌿
Water your peace lily only when needed and always allow excess water to drain. Avoid letting the plant sit in water for extended periods.
2. Choose the Right Pot and Soil 🪴🌾
Use a pot with drainage holes and a well-draining soil mix to promote healthy root growth. Repot your peace lily every year or two to refresh the soil and prevent compaction.
3. Monitor Humidity Levels 🌡💧
Peace lilies thrive in moderate humidity, but excessively high humidity can contribute to root rot. Keep your peace lily in a well-ventilated area and avoid placing it in overly humid spots.
4. Regular Health Checks 👀🌿
Perform regular health checks on your peace lily to catch any signs of root rot early. Inspect the leaves, stems, and roots periodically to ensure they are healthy and rot-free.
Conclusion: Protecting Your Peace Lily from Root Rot 🌿🛡
Peace lily root rot is a serious condition, but with proper care and attention, it can be prevented and treated. By understanding the causes and symptoms of root rot, you can take proactive steps to keep your peace lily healthy and vibrant.
Remember, the key to preventing peace lily root rot lies in balanced watering, proper drainage, and regular maintenance. With these practices in place, your peace lily will continue to thrive, bringing beauty and tranquility to your space for years to come.

