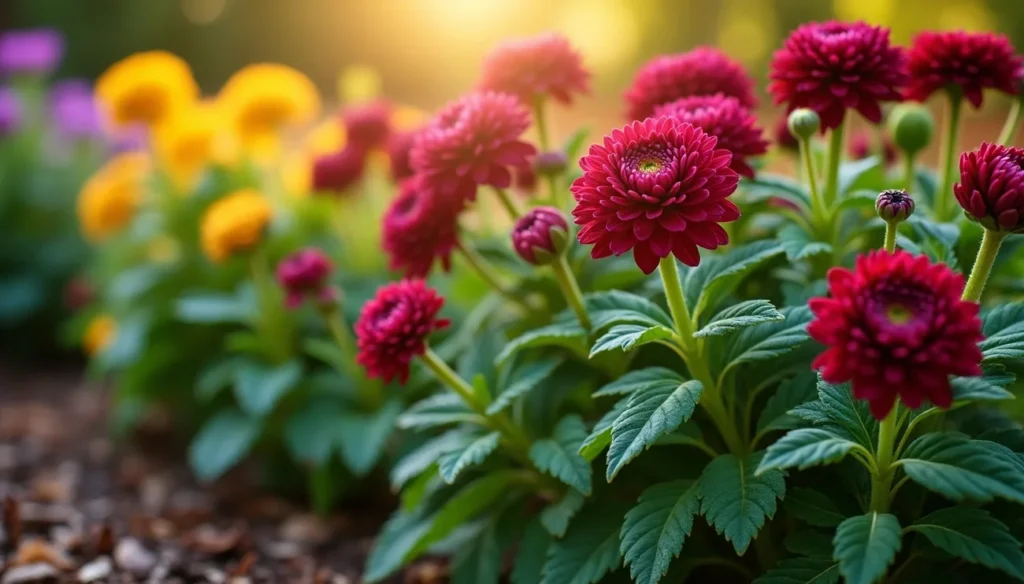
Proper mum plant care can extend the blooming time of mum plants to 4–8 weeks, sometimes even after the first frost. With hundreds of colours and forms, mums are perfect for decorating your home and garden.
Most gardeners struggle to keep mums blooming throughout the season. These plants require constant moisture. Potted mums need daily watering and thrive best with 4-6 hours of direct sunlight. Taking care of mum plants is simple when you know what to do. Blooming is easy when you know the right steps.
Whether you have hardy garden mums that survive in zones 5-9 or the more delicate types, the right care makes your mums last longer.
This mum care guide helps your plants produce vibrant colours when other flowers have stopped blooming. I cover everything from watering methods to sunlight needs, providing you with all the information you need to keep your mums looking great throughout the season.
Choose the Right Mum to Start With
The first step to getting season-long mum blooms starts with picking the right plant. Choosing carefully ensures your mums provide weeks of colour instead of fading after a few days. Since mums are a key part of your fall garden display, knowing what to look for before buying makes a big difference.
Look for unopened buds over full blooms.
Those fully blooming mums at the garden centre look great, but they’ve already used up most of their flowering power. Select plants with numerous tight, unopened buds that are just beginning to open their petals. Mums with more buds than open flowers can extend your display by two weeks or more. For optimal results, select plants with only a few flowers open. This allows you to see the colour while maximizing the longest possible bloom time.
If you need instant colour for a special event, fully blooming plants work fine. Otherwise, plants with tight buds will give you a much longer colour show for your porch, patio, or garden beds.
Inspect for healthy foliage and a strong root structure.
A healthy mum needs strong foundations. Check the plant carefully for these signs of good health:
- Look for bright, deep green leaves without yellowing or wilting
- Check that stems look full rather than leggy
- Make sure the soil feels slightly moist, not bone dry or soggy
- Gently remove the plant from its pot to check the roots; they should be pale and firm, not dark or mushy (indicating root rot)
Also, inspect both sides of the leaves for any signs of disease or pests. Healthy mums have thick foliage and stand up straight without drooping stems. Avoid plants with spotted or yellowing leaves, as these indicate stress or disease.
Buy locally grown mums for climate compatibility.
Locally grown mums tend to perform better than those shipped long distances. Plants native to your area have already adapted to your local climate, making them more likely to thrive in your garden. Horticulturist Tammy Sons advises, “Choosing mums in your area often means selecting the varieties that will thrive there, so always try to shop locally for this reason.”
Local nurseries usually stock varieties suited for your hardiness zone, giving your mums a better chance of surviving winter if you plant them in garden beds. Local plants also avoid the stress of long-distance shipping, which can weaken them and reduce the duration of their bloom.
Remember that mums come in two types: garden mums (hardy) and florist mums (not hardy). For outdoor planting with plans to overwinter, always pick garden mums from local sources.
Daily Mum Care to Keep Blooms Going
Image Source: Farmers’ Almanack
Daily care makes all the difference in keeping your mums blooming throughout the season. The maintenance routine isn’t difficult, but you need to be consistent to keep those vibrant colours going strong.
Watering tips for potted and garden mums
Mums need plenty of water to thrive. Check the soil moisture in potted mums daily. They usually require watering every day, especially when the temperature exceeds 75°f. Water the soil directly, rather than getting the leaves wet, to prevent fungal problems.
If your potted mum dries out completely, try this quick fix: set the entire pot in a bucket with a few inches of water for several hours. Garden mums don’t need watering as often as potted ones, but they still require about 1 inch of water per week.
You’ll know your mum needs water when the leaves droop and the soil feels dry when you stick your finger in up to the second knuckle. Water in the morning or evening when it’s cooler.
How much sunlight do mums need?
Mums do best with 4-6 hours of direct sunlight each day. Without enough sun, the blooms won’t last long. Placing your mums where they receive about 4-6 hours of full sun daily yields better growth, flowers, and hardier plants.
Not enough sunlight causes several issues: fewer flowers, smaller blooms, duller colours, and sometimes leggy growth as the plant reaches for light. During really hot weather, some afternoon shade helps extend the flowering period.
Why repotting helps mums thrive
Most mums from stores are completely root-bound, making it hard for the soil to hold water. Moving them to a pot about 2 inches larger allows the roots to spread out and significantly extends the time they bloom.
When repotting, follow these steps:
- Pick a slightly larger pot with good drainage
- Add quality potting soil to the bottom
- Loosen the tangled roots before putting the plant in the new pot
- Keep the soil surface about an inch below the rim
- Water thoroughly until it runs out of the drainage holes
Avoiding overwatering and root rot
Despite mothers needing lots of water, too much can cause serious problems. Watch for yellowing leaves that turn black and fall off as the first signs of trouble. Root rot happens when excess water can’t drain from containers.
To prevent root rot, always use pots with adequate drainage holes and allow the soil surface to dry between waterings. Don’t fertilize too heavily, as high salt levels can damage roots and make disease more likely.
Seasonal Adjustments for Long-Lasting Blooms
Mum’s care changes with the seasons. Each time of year needs specific attention to keep your plants producing the most flowers possible.
Spring: Prune and fertilize for new growth
Watch for fresh green shoots emerging from the base of your mums as winter comes to an end. Only remove dead stems after you see this new growth. Cutting too early damages the new shoots that last year’s foliage protects. Use a balanced 5-10-5 fertilizer, adding 1-1½ pounds per 100 square feet of garden area. This spring feeding helps build strong roots and prepares your plants for abundant blooms later.
Summer: Pinch back for bushier plants
Pinching is your best tool for creating compact, flower-filled mums during summer. When stems reach 6 inches in height, pinch off approximately 1 inch from each growing tip using your fingers. This allows two stems to grow where one was previously. Pinch every 2-4 weeks when new growth reaches 3-5 inches, but stop completely by July 4th (or by mid-July at the latest). After this, your mums need time to develop fall flower buds.
Fall: Protect from frost and deadhead regularly
Once blooming starts, remove spent flowers regularly to encourage more flowering. When frost is coming, cover garden mums with frost cloth that protects down to 25°F. Move potted mums indoors temporarily when temperatures drop below 50°f. Deadheading after frost damage allows the plant to focus its energy on healthy parts.
Winter: Mulch and avoid early pruning
Don’t cut back your mums completely after the first hard frost. Those dead-looking stems actually protect the crown and help hold mulch in place. Add 3-4 inches of loose mulch, such as straw, pine needles, or evergreen branches, around your plants. This prevents freeze-thaw cycles that can dislodge shallow root systems from the ground. Keep this protection in place until the spring frost danger has passed.
Advanced Tips to Extend Bloom Time
Want to get the most from your mums? These advanced techniques extend the Mum Plants’ Blooming period, keeping your autumn flowers vibrant well beyond their typical season.
Deadheading vs. pinching: What’s the difference?
These techniques serve completely different purposes. Deadheading removes spent blooms before they set seeds, sending energy back into making new flowers. Do this throughout the flowering season as colours fade, not after blooms turn brown.
Pinching removes growing tips to encourage branching, resulting in bushier plants with more flowers. This occurs in spring and early summer, before buds appear, and typically stops by mid-July to allow for flower development. The key difference is that deadheading maintains current blooms, while pinching shapes future growth.
Trick mums into blooming again with light control
Mums flower based on day length. Their biological clock triggers blooming as days shorten. You can manipulate this response to extend or create new bloom cycles. Reducing sunlight exposure tricks mums into thinking fall has arrived.
Professional growers create “artificial long days” by using night interruption lighting from 10:00 p.m. to 2:00 a.m. with intensities of 10-15 foot candles. For forcing flowers, cover plants to create artificial short days.
Fertilizer timing for stronger roots and flowers
The right feeding schedule can dramatically extend flowering periods. During growth phases, apply complete fertilizer at 250-300 ppm with each watering. High-ammonia fertilizers, such as 20-20-20, work best initially, then switch to 20-10-20 after two weeks.
Once flower buds form, the plants need fewer nutrients during flowering. Stop all fertilization three weeks before your planned display for hardier, longer-lasting blooms.
How to propagate mums for next season
Make free plants for next year using three methods:
- Division: In early spring, when new growth emerges, dig up plants and cut the root ball into three to five sections with a sharp knife.
- Cuttings: Take 2-3 inch sections of new growth in the spring or summer, remove the bottom leaves, and root them in peat moss or perlite.
- Seeds: Start indoors 6-8 weeks before last frost, transplanting when seedlings reach 6-8 inches tall.
Cuttings give the fastest results, flowering within months, while divisions keep the exact characteristics of parent plants.
Keeping Your Mum’s Beautiful Season After Season
This guide outlines key strategies to prolong the lifespan and enhance the appearance of your chrysanthemums. Always select plants with tight, unopened buds rather than those already in full bloom. Daily care is crucial once you bring these plants home, especially ensuring they receive sufficient watering and adequate sunlight.
Mums require 4-6 hours of direct sunlight daily and consistent watering, especially when they are in pots. Repotting store-bought mums into containers that are about 2 inches larger helps them bloom longer by giving their roots room to grow and improving water retention.
Seasonal care makes a big difference for mums. Spring pruning and fertilizing, summer pinching, fall frost protection, and winter mulching all help your plants thrive. Advanced techniques like deadheading, controlling light exposure, and timing fertilizer applications turn ordinary mums into showstoppers.
Propagation methods allow you to enjoy these plants year after year without incurring additional expenses. You can use division, cuttings, or seeds to expand your collection while keeping the features you love.
With these care strategies, you’ll have vibrant mum displays throughout the entire season. When people compliment your spectacular chrysanthemums, you’ll know exactly how you made it happen.

