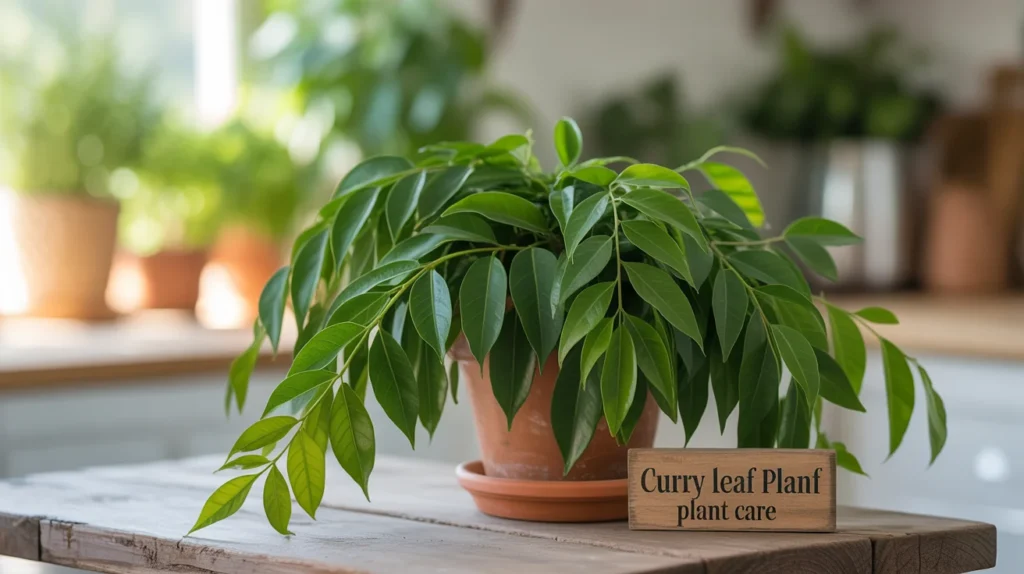
While growing Curry Leaf Plants may initially seem daunting, the success story of Kula Nursery and Diaspora Co. selling 430 kadi patta plants in just four hours is a testament to the potential for success. Despite its reputation as a challenging plant, the increasing demand for this aromatic herb for home cultivation highlights the importance of proper Curry Leaf Plant Care, showing that more and more people are eager to embark on this rewarding journey.
While it’s true that North American gardeners often find curry leaf plants challenging, the good news is that these aromatic treasures can indeed flourish with the proper care. They can grow anywhere from 6 to 20 feet tall, a testament to their potential for success in the right hands.
Your curry leaf tree runs on sunlight and needs at least 6-8 hours of direct sunlight daily. The plant loves well-drained, acidic soil with a ph between 6.4 and 6.9. Too much water stresses curry leaf plants the most, so you should only water when the top 1-2 inches of soil is dry.
Let me share some expert tips for curry leaf plant care that seasoned gardeners rarely discuss. We’ll explore everything from setting up the perfect growing space to fixing everyday problems. You’ll learn all you need to grow a healthy curry leaf plant that produces fragrant leaves for your cooking adventures.
Getting Started with Your Curry Leaf Plant
As a home gardener, your role in creating the ideal environment for your curry leaf plant is crucial. The proper setup is not just a key, but a responsibility that you undertake to ensure your plant’s success. You actively contribute to your plant’s health and well-being by providing the ideal growing conditions.
Choosing the right pot and soil
The container you select will substantially affect your curry leaf plant’s health. Start with a 1-2 gallon pot with drainage holes to prevent water pooling. Clay or terracotta pots work best because they let roots breathe better and help control moisture levels. These materials also prevent too much moisture from building up, which matters because curry leaf plants prefer slightly dry conditions.
Your curry leaf plants will grow best in well-draining soil that contains rich organic matter with a ph between 5.5 and 6.5. My experience shows that mixing equal parts of:
- Potting soil
- Perlite
- Vermiculite
It makes a perfect growing medium. You could also mix organic potting soil with extra perlite or pumice, or simply use a quality cactus mix.
How to transplant without damaging roots
Water your curry leaf plant a day before transplanting. This helps you remove it easily and limits transplant shock. Turn the plant sideways and tap the container gently to free the soil around its edges.
The root ball needs gentle handling to avoid damage. Add fresh soil to fill one-third of the new pot, place your plant in the centre, and add more soil around it. Keep the plant at its original depth, not too deep or shallow.
Original watering and placement tips
Give your newly transplanted curry leaf plant enough water until it flows from the drainage holes. Keep it away from direct sunlight for a few days. This helps your plant adjust to its new home without stress.
Let the soil dry about two inches deep between waterings to help roots grow strong. Curry leaf plants come from tropical areas and need warmth and bright light, but indirect light works better until they recover from transplanting. You can slowly move them into more direct sunlight over a week until they get the 6+ hours they need for best growth.
Creating the Ideal Environment
Your Curry Leaf Plant’s success depends on creating the proper growing environment. Understanding this tropical plant’s needs for Curry Leaf Plant Care will help you grow a healthy, fragrant specimen.
Sunlight needs: indoor vs outdoor.
Curry leaf plants love the sun and need 6-8 hours of direct sunlight daily. They do best in full sun outdoors, but light afternoon shade helps protect the leaves from burning in hot climates. If you notice your plant growing tall and spindly or producing smaller leaves, move it to a brighter location.
Finding the right spot is crucial for indoor plants. South-facing windows give the best light, while east and west-facing windows work well too. LED grow lights can help during winter months when daylight is limited. A heat mat set to 65-70°F under the pot will keep your plant happy as days get shorter.
Temperature and humidity requirements
These plants grow best in temperatures between 65°F and 90°F (18°C to 32°C). The plant becomes stressed if temperatures drop below 50°F (10°C) or go above 95°F (35°C). Quick temperature changes can shock your plant, causing leaves to drop and growth to slow down.
Since it’s tropical, your curry leaf plant needs 40-60% humidity. Watch for these signs of low humidity:
- Crispy leaf tips that look like potato chips
- Leaves curling inward
- Brown, brittle leaf edges
- Weak or stunted new growth
How to mist and why it matters
Misting helps create a pocket of moisture around your plant. This simple practice prevents those crispy edges and other dry-air problems mentioned earlier. A weekly misting during the growing season works well.
Use room-temperature water and mist in the morning to let leaves dry before nightfall. If regular misting doesn’t fit your schedule, you have other options. Try using pebble trays (keep water below the pebbles), grouping plants, or running a humidifier.
Your curry leaf plant comes from tropical regions and loves moisture in the air, not just in the soil. Good humidity levels support your plant’s health and help it produce those wonderful aromatic leaves that make cooking special.
Feeding, Watering, and Pruning
The lifeblood of successful curry leaf plant maintenance lies in proper feeding, watering, and pruning. These three practices work together to ensure your plant stays healthy and productive.
At the time, and how to fertilise
Curry leaf plants need regular fertilisation as moderate to heavy feeders. Apply a balanced, slow-release fertiliser every 4-6 weeks during the growing season (spring and summer). Your best results come from fertilisers with an NPK ratio of 6-2-4 or 8-2-4. These provide nutrients without overwhelming the plant.
These fertiliser options work effectively:
- Balanced, slow-release granular fertiliser
- Organic compost or well-rotted manure
- Fish/seaweed emulsion (every 2 weeks at half strength)
Water well before applying fertiliser to prevent root burn. This allows the nutrients to seep down to the roots.
How often to water and signs of overwatering
Check your curry leaf plant’s water needs by feeling the top 1-2 inches of soil. This finger test gives you a better gauge than following a strict calendar schedule. Your plant’s needs change based on temperature, humidity, and container size.
The biggest problem curry leaf plants face is overwatering. Watch for yellowing leaves, soft or mushy stems, fungal growth, and a wilted appearance despite wet soil. Underwatered plants show brown, brittle leaves and look shrivelled overall.
Pruning to get bushier growth and more leaves
Regular pruning helps create a bushy plant instead of a tall, leggy one. Start pruning after your plant reaches about 12 inches. Cut 3-4 inches from the top with clean, sharp tools. This gets more and thus encourages more side shoots, creating multiple branches with more leaves.
Younger Curry Leaf Plants should be hard pruned in early spring, especially in February. Remove yellow leaves, dead stems, and branches that grow too long for optimal Curry Leaf Plant Care.
Harvesting tips to maximise flavour
The morning offers the best time to harvest curry leaves, which are turgid and full of essential oils. Pick younger, tender leaves from the branch tips since they pack the most flavour. Use clean, sharp scissors to snip leaves just above a leaf node.
This stimulates new growth. To be environmentally responsible, harvest no more than one-third of the foliage at once and wait 4-6 weeks between major harvests.
Troubleshooting Common Issues
Curry leaf plants need quick attention when problems arise, even with careful tending. You can prevent minor issues from becoming major setbacks by spotting the warning signs early.
Yellowing leaves: causes and fixes
Watering problems often show up as yellowing leaves. When overwatered, your plant’s foliage turns soft and yellow with soggy soil, while underwatering makes leaves dry and brittle. The soil moisture level tells you to wait until the top two inches feel dry before watering. Yellow leaves often appear when roots sit in waterlogged soil, so well-draining soil is vital.
Plants turn yellow when they lack nutrients, especially nitrogen. A balanced fertiliser rich in nitrogen can fix this. You can treat iron chlorosis (yellow leaves with green veins) by spraying chelated liquid iron on the foliage. A simple Epsom salt spray works well for magnesium deficiency.
Sticky leaves and pest control
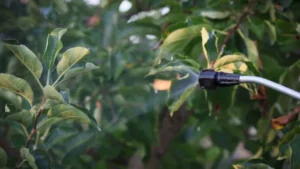
When sticky residue appears on leaves and nearby surfaces, scale insects are likely the culprits. These tiny pests leave honeydew behind and look like slight tan, brown, or black bumps under leaves and on stems. Aphids, mealybugs, and spider mites also commonly attack these plants.
Ways to curb these invaders:
- Neem oil or insecticidal soap works for mild infestations
- Mix diluted dishwashing soap with a drop of olive oil
- Stubborn scale responds to rubbing alcohol applied with cotton swabs
You can prevent stickiness through regular misting. Top watering and good air flow help too.
What to do during winter dormancy
Curry leaf plants naturally slow down in winter; yellowing leaves during this time shouldn’t worry you. Keep plants away from spots below 50°F; indoor plants need protection from cold drafts. Growth slows substantially in winter, so don’t use much water.
Let yellow leaves stay on during winter; your plant needs them to make it through the season. If you live in a northern climate, consider using a heat mat under the pot, set between 65-70°F.
How to revive a struggling plant
Patience pays off when bringing curry leaf plants back to health. Start by finding what’s wrong; it could be water issues, pests, or missing nutrients. Cut away dead parts, but keep stems that show reddish tips since they might sprout new growth.
Troubled plants need fresh, well-draining soil and a new pot. Let them recover in indirect light until new growth appears. Note that these plants are resilient. Spring often brings new leaves from stems that looked dead.
Conclusion
Growing a thriving curry leaf plant might seem challenging at first. However, with expert techniques, you can enjoy your own aromatic kadi patta at home. This piece reveals secrets that many gardeners won’t share, from picking breathable clay pots to mixing the perfect soil with equal parts potting soil, perlite, and vermiculite.
These tropical beauties need 6-8 hours of direct sunlight to thrive. They prefer temperatures between 65°F and 90°F with specific humidity levels. The finger test works better than any strict watering schedule. This simple method helps you avoid the most significant problem: overwatering.
Regular pruning helps turn leggy specimens into bushy, productive plants that give you flavorful leaves for cooking. Quick identification of why leaves turn yellow, pest problems, or dormancy issues lets you fix problems fast.
Patience becomes your best friend in curry leaf plant care. These tough plants often recover from near-death with proper care and time. They may have specific growing requirements, but fresh aromatic leaves in your kitchen make it worth the effort. Your experience with curry leaf plants will boost your gardening skills and cooking, a rewarding attempt for any plant enthusiast.

