Save your plants from mysterious deaths! Caring for potted plants isn’t as complicated as it seems. Even if you’ve struggled to keep plants alive in the past, this guide will help you turn things around.
Water is your plant’s lifeline, but getting it right is crucial. Too much water drowns roots. Too little water leaves plants thirsty and causes them to die.
Watering in the morning or evening works best, especially for outdoor plants. This timing prevents quick evaporation from the hot sun. Always pour water directly onto the soil, not onto leaves or flowers, so it reaches the roots where your plant actually absorbs it.
Proper drainage prevents root rot. Your pots need holes in the bottom so that excess water escapes. Without this simple feature, even the most perfect watering can can still harm your plants.
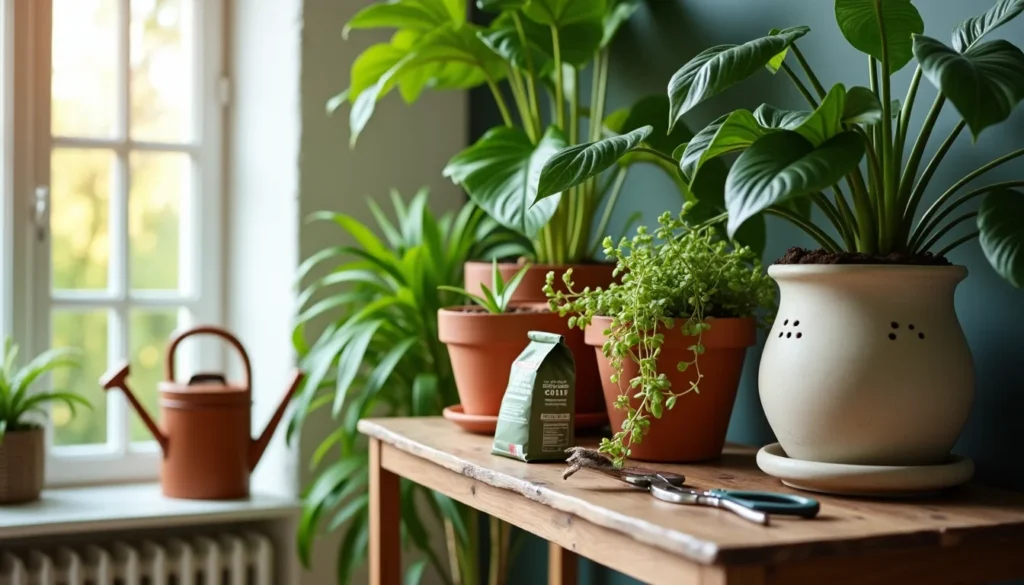
Most potted plants thrive with plenty of sunshine. Warm-weather varieties need 6-8 hours of direct sun daily. It makes windowsills perfect spots for your indoor green friends.
This guide walks you through everything you need for happy, healthy potted plants. Whether they’re brightening your living room or decorating your patio, you’ll learn exactly what your plant family needs to flourish.
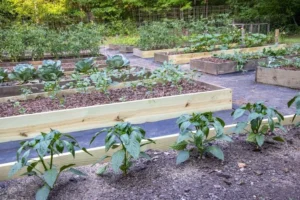
Pots & Soil: The Foundation of Plant Success
Image Source: Garden Design
The right combination of container and soil makes all the difference for your potted plants. What you choose directly impacts how your green friends grow throughout their lives.
Drainage Holes: Non-Negotiable
Drainage holes are essential for potted plants, as they prevent water from accumulating at the bottom of the container. Without proper drainage, excess water can create soggy conditions that suffocate roots, leading to root rot. Standing water also becomes a breeding ground for harmful bacteria and fungi, which can severely damage or even kill your potted plants.
Love a decorative pot without drainage? Here’s a simple fix: use it as a cover pot. Keep your plant in its plastic nursery pot with drainage holes, then place this inside your decorative container. For watering, just lift out the inner pot, water thoroughly, let it drain completely, and then return it to its decorative home.
For pots with extra-large drainage holes (bigger than 1 inch), place a few stones or broken terracotta pieces over them. It prevents soil erosion while still allowing water to flow freely.
Potting Mix: Not Actually Soil
Quality Matters
Despite its name, good potting soil contains no actual soil. It’s a specially formulated sterile mix designed for container plants. Garden soil is too dense for pots and quickly compacts, which suffocates plant roots.
What’s in quality potting mix?
- Sphagnum peat moss or coconut coir for water retention
- Perlite or vermiculite for better aeration
- Composted bark for structure and slow-release nutrients
- Sometimes, I add fertilizer for extra nutrition
Plant-specific needs matter too. Succulents and cacti need fast-draining mixes with added sand or pumice. Tropical plants prefer moisture-retentive options. Always check labels for your specific plant’s needs.
The feel of your mix matters just as much. Good potting soil feels lightweight, fluffy, and crumbly, never dense or heavy. This texture enables healthy root growth, optimal oxygen flow, and effective water movement.
Planting Steps for Success
When setting up your plant’s new home, follow these simple steps:
- Choose the right size container, not too small (which stunts growth) or too large (which holds too much moisture). Move up just one pot size when repotting.
- Fill your container about two-thirds with potting mix.
- For transplants, gently remove the plant from its current pot by turning it sideways and tapping the bottom until it slides out.
- Loosen the root ball with your fingers, especially if roots are circling tightly. It helps them grow outward into new soil.
- Position your plant so the top of the roots sits just below the container rim (about 2 inches).
- Add more potting mix around the sides, gently pressing to remove air pockets without compacting the soil.
- Leave a small gap between the soil surface and pot rim to prevent overflow when watering.
- Water thoroughly until moisture flows from drainage holes, ensuring the entire root ball gets evenly moistened.
This initial thorough watering helps settle the soil and provides your plant with immediate hydration, reducing transplant shock.
Light: Food for Your Plants
Light is plant fuel. Where you place your potted friends determines whether they’ll thrive or just survive. Understanding your home’s light conditions is your first step toward plant success.
Know Your Plant’s Light Appetite
Not all plants crave the same amount of light. Think of sunlight as food – some plants are big eaters, others prefer small portions.
Plants generally fall into these light categories:
- Full-sun plants need at least 6 hours of direct sunlight daily. These sun-lovers produce vibrant flowers and fruits.
- Part-sun/part-shade plants are happy with 3-6 hours of sun, preferably gentle morning light.
- Full shade plants require less than 3 hours of direct sunlight. These sensitive types burn in intense light.
Most warm-weather potted plants need 6-8 hours of sunshine daily. Cool-weather plants, such as lettuce, can thrive with just 3-5 hours of sunlight. Not enough light is the second biggest plant killer, right behind improper watering.
Watch for light warning signs. Plants getting too little light stretch toward windows, develop long stems with fewer leaves, and may stop flowering completely. Plants receiving too much sun develop crispy, brown edges, wilted leaves (even when the soil is moist), or a bleached-out color.
Finding Your Plant’s Perfect Spot
For indoor plants, window direction makes all the difference:
- South-facing windows deliver the strongest light (perfect for succulents, cacti, and Monstera deliciosa)
- North-facing windows provide gentle, indirect light (ideal for Snake Plants and ZZ Plants)
- East-facing windows offer bright morning light (great for Pothos and Philodendrons)
- West-facing windows bring afternoon sun intensity (works for sun-tolerant varieties)
Remember: “low light” doesn’t mean “no light.” Many plants sold as “low-light friendly” are actually just starving gracefully with minimal energy.
Outdoor potted plants also require thoughtful placement. Put sun-lovers in southern or western spots for maximum sunshine. Morning-sun fans do best with eastern exposure for a gentle wake-up light.
Also consider:
- Trees or buildings blocking light
- Distance from windows (keep most plants within 2-3 feet)
- Window size (larger windows spread light further)
Adjust as seasons change. During winter, move plants closer to windows as daylight hours shrink. Keep them away from cold drafts, though! As spring arrives, gradually return them to their preferred spots.
For outdoor containers, think strategically. Frame your entryway with matching large planters. Line walkways with consistent pots. Create groups with varying heights to add visual interest.
Watering Your Plants The Right Way
Image Source: Gardener’s Path
Watering might seem simple, but it’s often where plant parents go wrong. Your potted plants depend entirely on you for their drinks – no rain will save them if you forget!
Know When Your Plant Is Thirsty
The Finger Test
Push your finger into the soil up to your second knuckle. Dry soil? Time to water. Still moist? Wait a few days and check again. Simple but effective!
Visual clues matter too. Drooping leaves, shriveled stems, or general wilting usually means your plant needs a drink. But always check soil moisture first – these symptoms can signal other problems too.
For deep pots, try these tricks:
- Lift the pot – dry soil makes it noticeably lighter
- Use a wooden skewer – if it comes out dry, your plant is thirsty
Morning vs Evening: When to Water
Morning Watering
Early morning is the perfect time for watering. Your plants get to drink before the day heats up, and any splashed leaves dry quickly, preventing disease from developing.
Can’t water in the morning? Early evening works too. Just avoid late-night watering – wet leaves overnight invite fungal problems.
Never water during hot midday sun! It wastes water through evaporation and can scorch leaves.
Avoid Drowning Your Plants
Overwatering kills more plants than underwatering. Too much water suffocates roots, leading to root rot.
Warning Signs
Watch for these overwatering clues:
- Yellow, limp leaves that stay sad after watering
- Constantly wet soil that never dries
- Mushy, soft growth (especially in succulents)
- Dropping leaves despite your care
- Musty smell from the soil
Always use pots with drainage holes. Empty saucers after watering, so plants don’t sit in water. Only water when the top two inches of soil feel dry (completely dry for succulents).
When watering, do it thoroughly until water flows from the drainage holes. It helps roots grow deeper and stronger, unlike frequent shallow watering that keeps roots near the surface.
More Ways to Keep Your Plants Hydrated
Best Times to Water
- Early morning (ideal)
- Early evening (second best)
- Midday (never!)
- Late night (avoid)
Feed Your Plants Right
Image Source: Troy’s Tropics
Beautiful, thriving plants need more than just water and light. Proper feeding and regular care turn ordinary houseplants into stunning displays that brighten your home.
Fertilizer Basics
Potted plants depend on you for all their nutrients. Unlike garden plants, they can’t send roots deeper to find food.
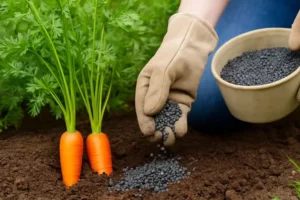
Feed your plants during their growth seasons – spring and summer. Most plants do best with fertilizer every 3-4 weeks.
Different plants have different appetites:
- Flowering plants and vegetables need frequent feeding
- Succulents and cacti need minimal fertilizer
For most of your plant family, a balanced all-purpose fertilizer, such as 4-4-4, works perfectly.
Try these fertilizer options:
- Water-soluble: Mix with water, apply every 2-3 weeks
- Slow-release granules: Mix into soil when planting, lasts 60-120 days
- Organic choices: Fish emulsion or seaweed for gentle feeding
Always water the soil before fertilizing to protect the roots. Follow package directions – under-fertilizing is safer than over-fertilizing, which can burn roots and brown leaf edges.
Trim for Health and Beauty
Deadheading (removing spent flowers) helps plants maintain a fresh appearance and encourages additional blooms. This simple task redirects energy from seed production back to flower creation.
To deadhead like a pro:
- Pinch or snip faded blooms just below the flower
- Cut above the first set of healthy leaves
- Morning is best when plants are well-hydrated
Regular pruning shapes your plants and keeps them healthy. Trim in late winter or early spring before new growth starts. Always use clean, sharp tools to prevent the spread of disease.
Don’t forget to remove yellow or damaged leaves – they’re just wasting your plant’s energy and can spread problems. For leggy, stretched-out plants, cut stems back by up to half to create fuller, more compact growth.
Plant Rescue Guide
Image Source: Yard and Garden – Iowa State University
Even the most skilled plant parents sometimes face problems. Catching issues early can save your green friends from permanent damage.
Is it too much or too little water?
Both overwatering and underwatering cause wilting, making diagnosis tricky.
Overwatered plants show:
- Soft, limp leaves with yellow edges
- Constantly wet soil
- Black or mushy roots
- Fungus gnats or mold on the soil
Underwatered plants have:
- Crispy brown leaf edges
- Bone-dry soil pulling away from the pot sides
- Unusually lightweight pots
- Plants that perk up briefly after watering
Yellow or brown leaves?
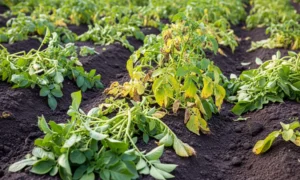
Yellow leaves typically indicate excessive water, insufficient nutrients, or inadequate light. First, check soil moisture – if soggy, let it dry before watering again. For chronically wet soil, check the drainage holes or repot the plant.
Brown leaf tips often signal low humidity, inconsistent watering, or fertilizer buildup. Try grouping plants for moisture or use a pebble tray with water. For fertilizer buildup, thoroughly flush the soil by watering until the water runs through the drainage holes.
Bringing plants back from the brink
Start by finding the main problem. For overwatered plants, let the soil dry completely and trim any rotted roots before repotting in fresh potting mix. Underwatered plants might need a 15-30 minute soak if the soil has become severely dry.
For nearly-gone plants, cut dead stems to just above the soil level, keeping any healthy growth intact. Remove all dead leaves to help your plant focus energy on recovery. Adjust the light conditions according to your plant’s preferences.
Remember: patience matters! Recovery can take up to a month before new growth appears. Skip fertilizer for struggling plants – it adds stress rather than helps.
Watch Your Plants Thrive
Plant problems? Even with perfect care, your potted friends sometimes need extra help. Spot the warning signs early and save your plants before it’s too late.
Overwatering vs. Underwatering
Both problems make plants wilt! Confusing, right?
Overwatered plants show:
- Soft, limp leaves with yellow edges
- Constantly wet soil
- Black, mushy roots
- Fungus gnats or fuzzy mold on the soil
Underwatered plants have:
- Crispy brown leaf edges
- Bone-dry soil pulling away from the pot sides
- Unusually lightweight when lifted
- Drooping that improves briefly after watering
Yellow or Brown Leaves?
Yellow leaves typically indicate excessive water, insufficient nutrients, or inadequate light. Check the soil first – if it’s soggy, let it dry before watering again. For constantly wet soil, improve drainage or repot the plant.
Brown leaf tips? Your plant needs more humidity, consistent watering, or a balanced fertilizer application.
Group plants together for shared moisture or use a pebble tray with water. For salt buildup, thoroughly flush the soil by watering until water runs out of the drainage holes. Then, repeat the process after the soil has drained.
Saving Struggling Plants
First, find the main problem. For overwatered plants, dry the soil and trim rotted roots before repotting in fresh mix. Underwatered? Soak the entire pot for 15-30 minutes if the soil has completely dried out.
For severely sick plants:
- Cut dead stems to just above soil level
- Remove all dead leaves
- Move to better light conditions
- Be patient – new growth takes time!
Skip fertiliser for struggling plants – it adds stress instead of helping. Recovery may take up to a month, so don’t give up on your green friends too soon.

